Note: This post was originally written in 2015 and i’ve recieved great sucess stories from numerous people of whom it has helped. I’ve had reports of this technique working for many of the later iPhone models and even the Apple watch! This post was also used as a reference in the book High Performance iOS Apps. What follows is the original article.
Sometimes you have to dig deep in search of optimization; one such place is power usage. Unfortunately Apple’s energy profiling tool with its ‘relative’ energy usage statistics just don’t always give you the clarity you require.
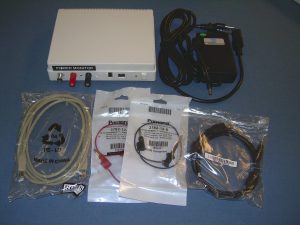
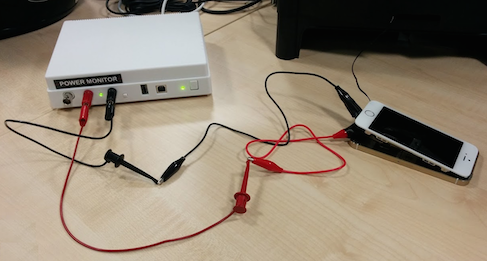
The solution: ‘Power Monitor’ from Monsoon Solutions. It claims to replace the battery of most mobile devices and provide true statistics of power use in real-time, in-fact it’s so good it’s even referenced in Google’s android documentation.
There seems to be a lot of information available for the Power Monitor relating to use with devices where the user can easily remove the battery, but what about a ‘sealed’ handset like the iPhone? Well it’s entirely possible and here’s how to use the Monsoon Solution Inc Power Monitor with an iPhone 5s…
Please Note : You follow this guide at your own risk, I won’t be held responsible for whatever happens to your hardware or your health. Please take precautions as lithium-iron batteries can be volatile if tampered with.
The first step is to remove the battery from the device, I won’t document this part here because there are already many well written articles elsewhere on how to do this. For example this PC Advisor article and this Forbes article.
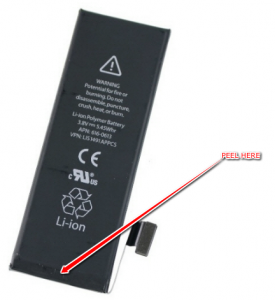
Now you have the battery out of the phone you should see some black tape on the bottom of it (shown in image above) you need to peel this tape away (Peel only this tape at the end; don’t go unrolling the entire battery!) this will expose the battery’s PCB.
The PCB now exposed provides the phone with information on the battery such as capacity and current charge, it also contains fuses for over-current protection but the important thing for us to know right now is that without this PCB the phone will not boot and it is to this PCB that we must connect the monsoon.
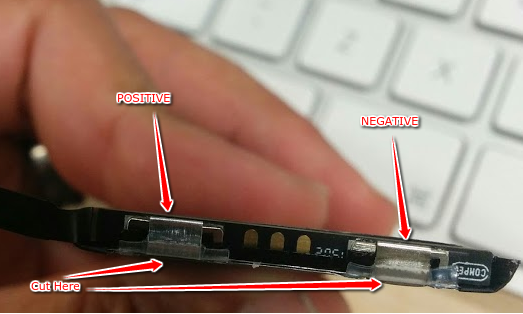
Now its time to separate the PCB from the lithium-iron cells, the annotation ‘Cut Here’ in the image above points to two small aluminium tabs, these are all that connects the PCB to the cells, I simply cut them with scissors negative side first.
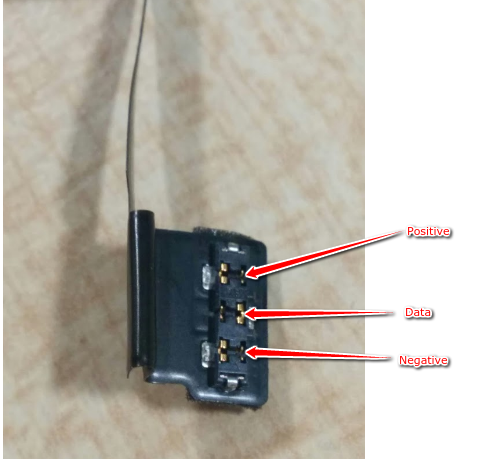
Now your PCB and ‘connector’ should be fully separated from the body of the battery, connect your Monsoon Power Monitor respectively to the two terminals (Shown in the image above) ‘Positive’ and ‘Negative’, its worth noting that the positive terminal is the one closest to the ‘connector’ end of the PCB and the negative the furthest away.
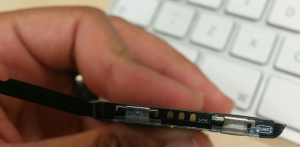
Now we have our Monsoon Power Monitor connected to the battery PCB we are ready to connect the assembly back to the phone, however before we do this make note of the connector assembly’s pin-out, the main point of interest here is the Negative pin as we’re going to need to connect this pin to the negative tab of the PCB from the previous picture. Don’t do this just yet (we need to connect it to the phone first) but take note of which pin is the negative one.
Note: There are reports around the internet of ‘tamper protection’ on the battery PCB. It turns out these reports are false. I; like may others failed to power on the PCB after separating it from the lithium-iron cells and feared tamper protection until Tom Lee in the [comments of Jason Gin’s](https://ripitapart.wordpress.com/2014/07/25/looking-inside-an-iphone-5-battery/) Blog pointed out that it is actually a form of surge protection that can be overcome by connecting the two negative terminals.
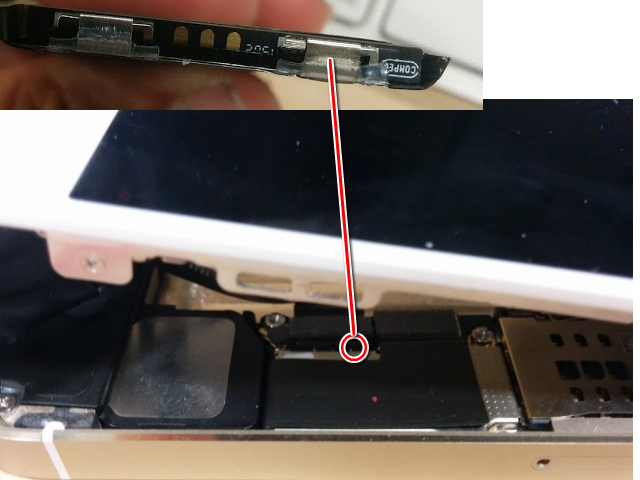
With our PCB connector attached back to the phone and our power monitor attached to our PCB we’re almost done! Load up the power monitor software and enable power output to the iPhone, try and turn on the phone and you may realise it’s not turning on! (Oh no!) but it’s OK, we only require this last step to reset the protection circuitry on the PCB, as mentioned earlier all we need to do is connect the negative tab of the battery PCB (Or the negative connection from the power monitor) to the negative pin on the connector, I do this with a very thin wire. I’ve put an image below to show exactly the two places that need to be connected once the connector is attached to the phone, this step must be done every time you power on the power monitor the iPhone will simply not boot without doing this as once the PCB looses all power it goes back into its ‘locked’ state. The connection between these two points does not need to be permanent they only have to touch for a split second while there is power and the phone will then run.
As soon as you successfully connect these two negative terminals you will see activity on your power monitor then you can press the power button and fully boot up the device.
That’s all! you can now go away and do some deep power analysis with your power monitor on your iOS apps and hardware.
The analysis provided by these devices can be invaluable. If you find this post useful please share it. Thanks.